Sewing guide tools are essential for accuracy, helping beginners and experts alike achieve professional results. They streamline projects and improve stitch quality.
These tools enhance precision, making sewing more enjoyable and less frustrating, ultimately boosting confidence in your crafting abilities.
What is a Sewing Guide Tool?
A sewing guide tool encompasses a range of implements designed to assist in maintaining straight, consistent seam allowances and accurate stitch placement during sewing projects. These tools aren’t a single item, but rather a category including magnetic seam guides, seam tapes, and even specialized presser feet.
Essentially, they act as a physical reference point, preventing fabric from drifting while under the presser foot. This is particularly helpful for beginners still developing muscle memory and control. They ensure uniformity, crucial for garment construction and quilting. Utilizing these tools leads to neater, more professional-looking finished products, minimizing errors and wasted fabric. They are invaluable for achieving precision in all sewing endeavors.
Why Use a Sewing Guide Tool?
Employing a sewing guide tool dramatically improves sewing accuracy, especially for novices. They combat the common issue of inconsistent seam allowances, leading to ill-fitting garments or uneven quilting. These tools minimize frustration by providing a reliable visual or physical boundary for fabric edges.
Beyond accuracy, guide tools boost sewing speed and efficiency. They reduce the need for constant measuring and re-adjusting, allowing for a smoother workflow. Ultimately, using these tools fosters confidence and encourages more ambitious projects. They are a small investment that yields significant returns in terms of project quality and overall sewing enjoyment, making the process more rewarding.

Essential Sewing Tools for Beginners
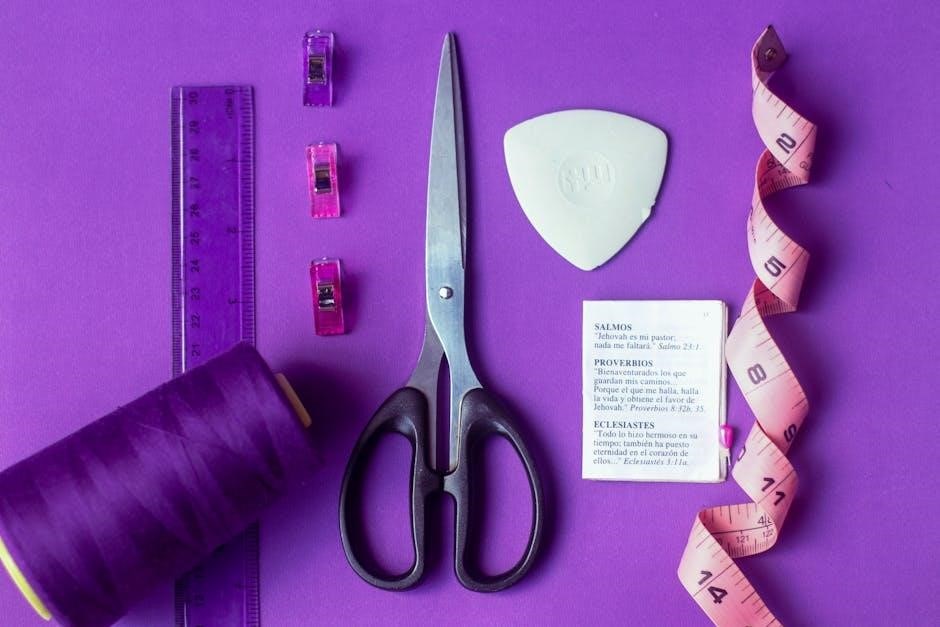
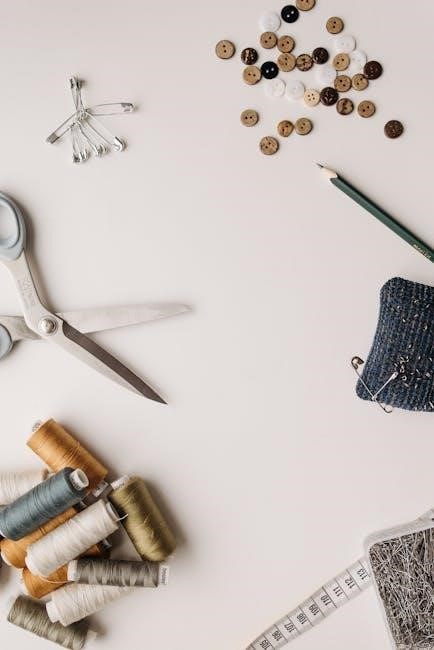
Essential tools include measuring tapes, fabric scissors, marking tools, and a reliable sewing machine – foundational for any aspiring seamstress’s toolkit.
Measuring Tools
Accurate measurements are the cornerstone of successful sewing projects, and having the right tools is paramount. Rulers and yardsticks are invaluable for measuring straight lines and larger pattern pieces, ensuring precise cutting and layout. They provide a stable edge for drawing straight lines, crucial for pattern adjustments.
However, for curves and body measurements, a measuring tape is indispensable. These flexible tapes conform to the body’s contours, providing accurate readings for clothing construction. Understanding how to read a measuring tape correctly – noting the small increments – is key to achieving a well-fitted garment. Both tools work in tandem to guarantee project accuracy.
Rulers and Yardsticks
Rulers and yardsticks are foundational measuring tools in sewing, offering rigidity for precise straight-line measurements. Clear markings in inches and centimeters allow for versatile use across various projects. They excel at measuring pattern pieces, ensuring accurate fabric cutting, and drawing straight seam allowances.
A yardstick, being longer, is particularly useful for measuring larger fabric widths – often 45″ or 60″ – and verifying grainlines. Using a ruler or yardstick alongside a rotary cutter provides a safe and accurate cutting guide. These tools are essential for pattern drafting and alterations, guaranteeing a professional finish.
Measuring Tape
A measuring tape is arguably the most versatile tool for any sewing project. Unlike rigid rulers, its flexibility allows for taking body measurements – crucial for accurate pattern sizing and garment fit. It conforms to curves, making it ideal for measuring waistlines, hips, and other non-linear dimensions.
Measuring tapes are also essential for determining fabric requirements, ensuring you purchase enough material for your design. Double-sided tapes, marked in both inches and centimeters, offer convenience. When using a measuring tape, ensure it’s not stretched or twisted to maintain accuracy, leading to a well-fitted and professionally finished garment.
Cutting Tools
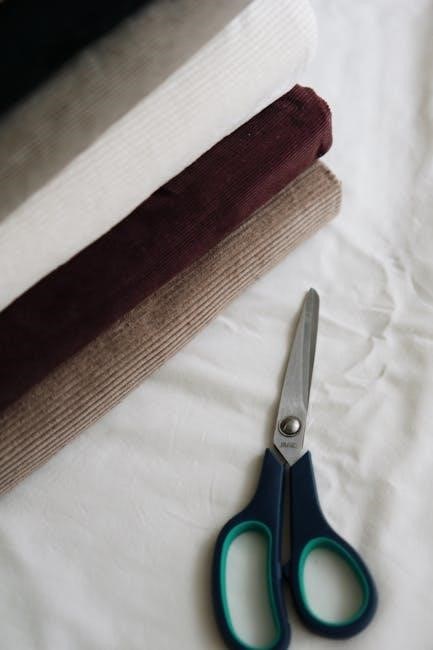
Precise cutting is paramount in sewing, and having the right tools makes all the difference. Fabric scissors are specifically designed for cutting fabric; using them on paper will dull the blades. Invest in a high-quality pair and dedicate them solely to fabric for longevity.
Rotary cutters and mats offer an alternative, particularly for straight cuts and multiple layers. The rotary cutter rolls across the fabric, guided by a clear acrylic cutting mat, providing clean, efficient cuts. These are especially useful for quilting and projects requiring precise geometric shapes. Always use a fresh blade for optimal results.
Fabric Scissors
Fabric scissors are a cornerstone of any sewing kit, demanding dedicated use solely for fabric to maintain their sharpness. Unlike general-purpose scissors, fabric scissors boast angled blades that lift the fabric as they cut, ensuring clean, precise lines.
Investing in a quality pair is crucial; consider the handle comfort for extended use. Regularly sharpen your fabric scissors to preserve their cutting edge. Avoid using them on paper or other materials, as this will quickly dull the blades, compromising their performance and requiring frequent sharpening or eventual replacement.
Rotary Cutters and Mats
Rotary cutters and mats offer a fast and accurate alternative to traditional scissors, particularly for straight cuts and quilting. A rotary cutter features a circular blade that rolls across the fabric, while the self-healing mat protects your work surface and extends the blade’s life.
Different blade sizes cater to various fabric layers; a 45mm blade is versatile for most projects. Always use a fresh blade for clean cuts and replace it when it becomes dull. Safety is paramount – always retract the blade when not in use and consider a cutter handle with a safety lock.
Marking Tools
Accurate marking is crucial for transferring pattern symbols and ensuring precise sewing. Tailor’s chalk is a classic choice, available in various colors for different fabric shades. It easily brushes away, but test on a scrap first to confirm removal. Fabric markers, both washable and permanent, offer finer lines.
Washable markers are ideal for temporary markings, disappearing with water or laundering. Permanent markers are best for details needing to withstand washing, but use cautiously! Always test any marking tool on a fabric scrap to ensure it doesn’t stain or leave residue. Precise markings lead to professional-looking results.
Tailor’s Chalk
Tailor’s chalk remains a staple marking tool, prized for its ease of use and affordability. Available in a spectrum of colors – white, yellow, pink, blue, and more – it allows for clear visibility on diverse fabric backgrounds. This makes it incredibly versatile for transferring pattern markings, dart locations, and seam lines.
However, always test on a fabric scrap! While generally removable with a brush, some fabrics may retain chalk residue. It’s best suited for lighter-weight fabrics. For darker materials, brighter chalk colors provide better contrast. Tailor’s chalk is a forgiving tool, perfect for beginners learning to accurately mark their projects.
Fabric Markers
Fabric markers offer a more permanent marking solution compared to tailor’s chalk, ideal for intricate designs or markings needing to withstand handling. These come in various tip sizes – fine-point for detailed work and broader tips for bolder lines. Water-soluble markers are popular, easily disappearing with a damp cloth, but always test for colorfastness!
Permanent fabric markers are available for designs intended to remain visible after washing. Consider the fabric type; some markers bleed on delicate materials. They’re excellent for quilting, embroidery outlines, and precise pattern transfers. Always test on a scrap to ensure desired results and prevent unwanted staining.
Understanding Sewing Patterns
Decoding patterns requires learning symbols and layout instructions; indie patterns often include detailed guidance and sewalongs for easier comprehension and successful projects.
Decoding Pattern Symbols
Pattern symbols are a universal language for sewers, representing crucial information for accurate garment construction. Understanding these markings is paramount to a successful sewing project. Common symbols include grainline arrows, indicating fabric orientation, and notches, used for matching pattern pieces. Cutting lines dictate where to cut the fabric, while seam allowances are represented by dotted lines.
Other symbols denote darts, pleats, buttonholes, and placement for pockets or zippers. Many beginner patterns include a key explaining each symbol, but familiarity comes with practice. Utilizing resources like online tutorials and sewing guides can accelerate this learning process. Properly interpreting these symbols ensures your fabric pieces align correctly, resulting in a well-fitted and professionally finished garment. Ignoring them can lead to frustrating errors and a poorly constructed final product.
Pattern Layout and Grainlines
Pattern layout refers to how pattern pieces are arranged on fabric before cutting, maximizing material usage and ensuring correct garment construction. Grainlines, indicated by arrows on pattern pieces, are critical; they must align with the lengthwise grain of the fabric. This ensures the fabric hangs properly and the garment maintains its shape.
Ignoring grainlines can cause stretching, distortion, or an ill-fitting final product. Layout instructions often suggest efficient arrangements, but creative layouts are possible. Consider nap (directional pile) when laying out fabrics like velvet. Careful planning minimizes waste and guarantees pieces are cut accurately, contributing significantly to a professional finish. Always double-check grainline alignment before cutting!
Choosing the Right Pattern Size
Selecting the correct pattern size is paramount for a well-fitting garment. Don’t rely on your ready-to-wear size; pattern sizes differ significantly. Take accurate body measurements – bust, waist, and hips – and compare them to the pattern’s size chart. It’s common to fall between sizes; choose the larger size for ease of alteration.
Many indie patterns offer more detailed size charts and often include finished garment measurements, aiding in a better fit. If you’re unsure, it’s always better to err on the side of larger, as taking fabric in is easier than letting it out. A well-fitted garment starts with the right pattern size!
Fabric Selection for Sewing Projects
Choosing the right fabric is crucial; consider drape, weight, and fiber content. Patterns often suggest suitable fabrics for optimal results and ease of sewing.
Understanding Fabric Widths (45″ vs. 60″)
Fabric width significantly impacts your project’s yardage needs and layout. Most fabrics come in two standard widths: 45 inches and 60 inches. Traditionally, patterned cotton fabrics found in quilt shops are often 45 inches wide, while apparel fabrics tend to be 60 inches wide.
Using wider fabric (60″) can often reduce the total yardage required for a project, potentially saving you money. However, pattern layouts are designed with specific widths in mind, so always check the pattern instructions. Understanding these differences allows for efficient fabric usage and accurate project planning, minimizing waste and ensuring a successful outcome.
Careful consideration of fabric width is a key element in achieving a well-planned and executed sewing project.
Beginner-Friendly Fabric Types
Starting with the right fabric is crucial for a positive sewing experience. Cotton fabrics are highly recommended for beginners due to their stability, affordability, and ease of handling. They hold a crease well, making cutting and sewing simpler. Linen fabrics, while slightly more challenging, offer a beautiful texture and are relatively easy to work with once familiar with cotton.
These fabrics provide a stable base for learning basic sewing techniques. They don’t fray excessively and respond well to standard machine settings. Choosing beginner-friendly materials builds confidence and allows you to focus on mastering fundamental skills before tackling more complex textiles.
Cotton Fabrics
Cotton fabrics are a superb choice for novice sewers, offering a forgiving and versatile base for learning. Their stability prevents excessive shifting during cutting, and they hold creases well, aiding in accurate pattern placement. Commonly found in 45″ widths at quilt shops, cotton is readily available and affordable.
This makes it ideal for practicing techniques without significant investment. Cotton accepts stitches cleanly and doesn’t easily fray, simplifying seam finishing. From quilting cottons to broadcloth, the variety allows exploration of different textures and weights, building foundational skills. It’s a truly excellent starting point!
Linen Fabrics
Linen fabrics, while slightly more challenging than cotton, present a wonderful learning opportunity for aspiring sewers. Known for its beautiful drape and breathability, linen offers a more refined aesthetic. However, it wrinkles easily, requiring careful pressing throughout the sewing process – a valuable skill to develop.
Linen’s tendency to fray necessitates precise seam finishes, encouraging attention to detail. It’s often found in the 60″ width common to apparel fabrics, potentially reducing yardage needs. Working with linen builds confidence in handling natural fibers and mastering techniques for managing fabric movement.
Fabrics to Avoid as a Beginner
Starting with easier fabrics is crucial for building sewing confidence. Highly slippery materials like rayon and silk present significant challenges due to their tendency to shift during cutting and sewing. These fabrics require specialized techniques and tools that can overwhelm a beginner.
Similarly, stiff fabrics such as denim are difficult to manipulate with a standard sewing machine. Attempting to sew a flowy garment from denim will yield an undesirable, structured result. These fabrics demand stronger machines and more advanced skills. Focusing on stable, beginner-friendly options fosters success and enjoyment.
Slippery Fabrics (Rayon, Silk)
Rayon and silk, while beautiful, are notoriously difficult for beginners due to their inherent slipperiness. These fabrics shift and slide easily, making accurate cutting and sewing a real challenge. Maintaining consistent seam allowances becomes incredibly frustrating without significant experience.
The lack of grip requires slower sewing speeds and often necessitates the use of specialized tools like walking feet or tissue paper to stabilize the fabric. These added complexities can quickly discourage a new sewer. It’s best to postpone working with these materials until you’ve mastered basic techniques with more stable fabrics.
Stiff Fabrics (Denim)
Denim, known for its durability, presents unique challenges for beginner sewers due to its substantial stiffness. This rigidity makes it difficult to manipulate, especially when attempting curves or intricate details. Standard sewing machines may struggle to penetrate multiple layers effectively, leading to skipped stitches or strain on the motor.
Successfully sewing denim requires a robust machine, heavy-duty needles, and potentially a walking foot to ensure even fabric feed. Attempting a flowy garment from denim will yield a structured result, not the desired drape. Starting with lighter-weight fabrics builds essential skills before tackling denim’s resistance.
Sewing Machine Feet and Their Uses
Presser feet are vital accessories, expanding a sewing machine’s capabilities. Different feet tackle specific tasks, from standard stitching to zippers and buttonholes.
Selecting the correct foot ensures optimal fabric handling and stitch quality for each project.
Standard Presser Foot
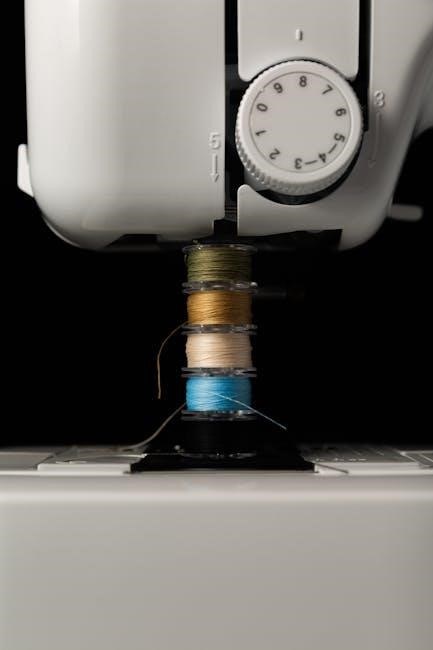
The standard presser foot is the workhorse of your sewing machine, included with most models and used for a vast majority of everyday sewing tasks. It’s designed for straight and zigzag stitching on woven and knit fabrics, making it incredibly versatile for beginners and experienced sewists alike.
This foot features a flat sole and a needle slot, allowing the needle to pass through the fabric smoothly. It’s ideal for constructing garments, quilting, home décor projects, and general sewing applications. Mastering its use is fundamental to building a solid sewing foundation. It provides consistent pressure, ensuring even stitch formation and fabric feed.
While seemingly simple, the standard foot’s effectiveness relies on proper tension settings and the correct needle type for the fabric being used;
Zipper Foot
The zipper foot is a specialized presser foot designed to simplify the often-challenging task of sewing zippers. Unlike the standard foot, it features a groove or adjustable guide that allows the foot to sew incredibly close to the zipper teeth, creating a neat and professional finish.
This foot can be positioned on either the left or right side of the zipper, accommodating various zipper application techniques. It’s essential for installing zippers in garments, bags, and other projects where a clean, close stitch line is crucial.
Using a zipper foot eliminates the guesswork of maintaining consistent distance from the zipper, resulting in a secure and aesthetically pleasing installation. It’s a must-have tool for anyone working with zippers regularly.
Buttonhole Foot
The buttonhole foot is a presser foot specifically engineered to create perfectly sized and finished buttonholes on your sewing machine. It often works in conjunction with the machine’s built-in buttonhole settings, automating the process for consistent results.
This foot typically features a slot or guide that accommodates buttons of various sizes, allowing the machine to stitch around them accurately. It simplifies what can be a tricky maneuver, ensuring clean edges and a secure buttonhole opening.
Using a buttonhole foot guarantees professional-looking buttonholes, saving time and frustration. It’s an invaluable tool for garment construction and projects requiring durable and aesthetically pleasing button closures.
Resources for Learning to Sew
Numerous resources, like books and online communities, offer guidance. “You And Your Sewing Machine” is highly recommended, alongside Reddit’s r/sewhelp for support.
Recommended Sewing Books
Embarking on a sewing journey often benefits from the structured knowledge found within comprehensive sewing books. These resources provide detailed explanations and visual aids, proving invaluable for both beginners and experienced sewists. One standout recommendation is “You And Your Sewing Machine: A Field Guide” by Bernie Tobisch.
This book is frequently praised within online sewing communities, such as r/sewhelp on Reddit, for its thorough coverage of various aspects of sewing. It doesn’t just cover the mechanics of the machine; it delves into materials, different presser feet, stitch uses, thread types, and needles.
A user specifically highlighted its five-page section dedicated to fabric types, making it a particularly useful resource for understanding material properties and suitability for projects. It’s a book many discover at libraries and immediately purchase for their personal collection.
“You And Your Sewing Machine: A Field Guide” by Bernie Tobisch
Bernie Tobisch’s “You And Your Sewing Machine: A Field Guide” is a highly recommended resource for anyone looking to deepen their sewing knowledge. Frequently lauded by the r/sewhelp community on Reddit, this book distinguishes itself through its comprehensive approach to the craft. It’s not merely a manual for operating a sewing machine, but a detailed exploration of the entire sewing ecosystem.
The book covers a wide range of topics, including various fabric types – a five-page section is dedicated to this – thread selection, needle choices, and a plethora of other sewing paraphernalia. This makes it an excellent choice for beginners seeking a foundational understanding, and for experienced sewists wanting to refine their skills.
Online Sewing Tutorials and Communities
The digital realm offers a wealth of resources for aspiring sewists, fostering a collaborative learning environment. Platforms like YouTube are brimming with visual tutorials, demonstrating techniques from basic stitches to complex pattern alterations. However, dedicated online communities provide invaluable support and troubleshooting assistance.
r/sewhelp on Reddit stands out as a particularly active and helpful forum. Users frequently seek advice on everything from fabric selection to machine maintenance, and receive thoughtful responses from experienced members. This interactive format allows for personalized guidance and a sense of camaraderie, making the learning process more engaging and less daunting.
r/sewhelp on Reddit
r/sewhelp is a vibrant online community dedicated to assisting sewists of all skill levels. Users actively seek and share knowledge, creating a supportive atmosphere for learning and problem-solving. A recent post highlighted a request for introductory sewing book recommendations, specifically covering materials, presser feet, and stitch uses.
One highly recommended resource mentioned was “You And Your Sewing Machine: A Field Guide” by Bernie Tobisch, praised for its comprehensive coverage of fabrics, threads, and essential sewing paraphernalia. The community’s willingness to share personal experiences and recommendations makes r/sewhelp an invaluable resource for navigating the world of sewing.
Indie Sewing Patterns and Sew-Alongs
Indie sewing patterns are gaining popularity, particularly among beginners, due to their detailed instructions and supportive learning environments. Unlike mass-produced patterns, indie designers often provide extensive resources, including sew-alongs, which are guided group sewing projects.
These sew-alongs offer step-by-step assistance, fostering a sense of community and providing opportunities to ask questions and receive feedback. This collaborative approach is incredibly beneficial for those new to sewing, helping them build confidence and master new techniques. The detailed nature of indie patterns simplifies complex projects, making them more accessible.