Graco Benton 5-in-1 Convertible Crib Assembly Instructions: A Comprehensive Guide
This guide provides detailed, step-by-step instructions for assembling your Graco Benton crib, ensuring a safe and secure sleep environment for your little one․
Access the official assembly video and downloadable manual for visual aid and comprehensive support throughout the process․
The Graco Benton 5-in-1 Convertible Crib is designed with both functionality and style in mind, offering a versatile sleep solution that grows with your child․ This crib seamlessly transitions through five distinct stages: crib, toddler bed, daybed, and full-size bed, providing lasting value and adaptability․
Its classic design complements a variety of nursery decors, while its durable construction ensures years of reliable use․ Before beginning the assembly process, familiarize yourself with all the components and read these instructions thoroughly․ Proper assembly is crucial for the safety and stability of the crib․
Microsoft’s campus, while seemingly unrelated, highlights long-term investment in growth, mirroring Graco’s commitment to providing adaptable products like the Benton crib․ This crib is a cornerstone of a nurturing environment․
Unboxing and Parts Inventory
Carefully unpack all components from the shipping box, ensuring you have ample space to work․ Cross-reference the parts list included in your assembly manual with the physical pieces to verify everything is present․ This initial inventory is vital to avoid delays during assembly․
Typical components include headboard, footboard, two crib sides, mattress support, hardware packs (screws, bolts, and cam locks), and potentially conversion kit pieces․ Note any discrepancies immediately and contact Graco customer support for missing parts․
Like Microsoft’s meticulous campus planning, a detailed parts check ensures a solid foundation․ Keep the packaging material until assembly is complete, just in case a return is necessary․ A thorough inventory prevents frustration later․
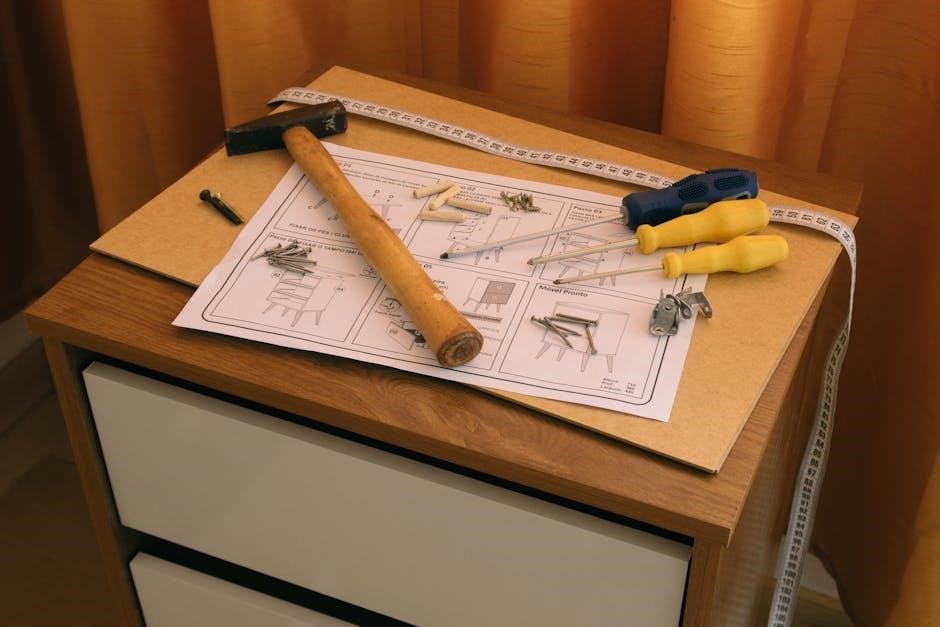
Tools Required for Assembly
Successful assembly of your Graco Benton crib requires a few essential tools․ A Phillips head screwdriver is crucial for most screw applications․ A flathead screwdriver may be needed for certain cam lock adjustments․ While not always mandatory, a rubber mallet can assist with gently securing pieces together, preventing damage․
Consider using a power drill with adjustable clutch settings to expedite the process, but exercise caution to avoid over-tightening screws․ A soft cloth or blanket placed beneath the crib during assembly will protect the finish from scratches․
Similar to maintaining Microsoft’s expansive campus, having the right tools ensures efficient and careful construction․ Ensure all tools are in good working order before beginning․

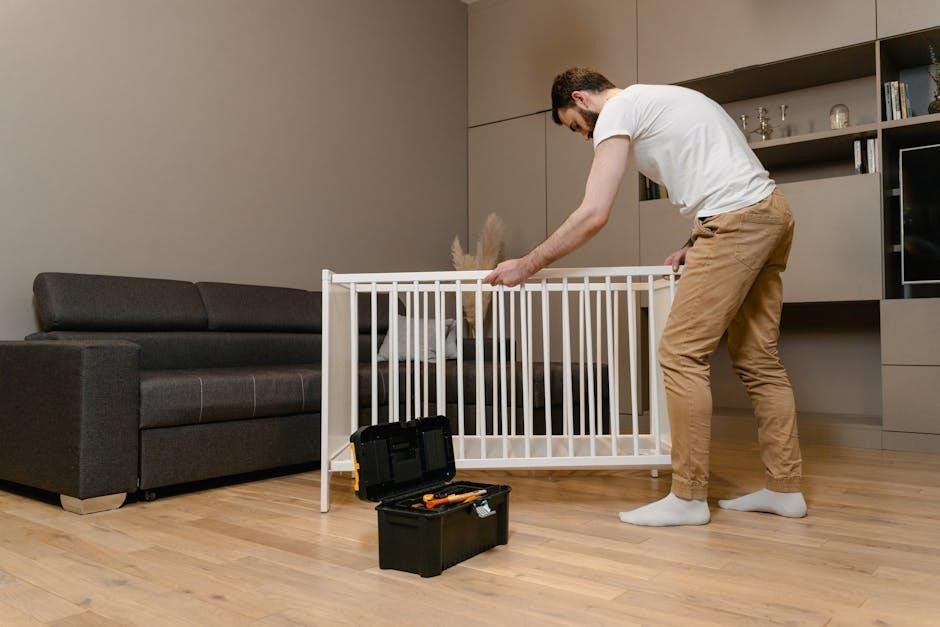
Step-by-Step Assembly Process
Follow these clear, sequential instructions to build your Graco Benton crib safely and efficiently, referencing the official video for guidance․
Assembling the Crib Sides
Begin by identifying the left and right crib side panels․ Carefully attach the metal brackets to the inner side of each panel using the provided screws – ensure they are firmly secured, but do not overtighten․
Next, connect the side panels to the headboard and footboard․ Align the pre-drilled holes and use the longer bolts and washers to create a stable initial frame․ Double-check alignment before fully tightening all connections․
Pay close attention to the orientation of the panels; the smooth, finished sides should face outwards․ A properly assembled frame is crucial for the crib’s overall stability and safety, so verify each connection․
Attaching the Headboard and Footboard
Carefully position the headboard and footboard upright․ Align them with the pre-drilled holes on the assembled crib side panels․ Utilize the provided cam locks and wooden dowels to initiate a secure connection between these components․
Insert the wooden dowels into the corresponding holes, then gently push the headboard and footboard onto the dowels․ Rotate the cam locks clockwise using a screwdriver until they firmly engage, locking the pieces together․
Ensure a flush and stable connection; any gaps could compromise the crib’s structural integrity․ Double-check that all cam locks are fully rotated and secure before proceeding to the next assembly step․
Installing the Mattress Support
Locate the mattress support frame and the corresponding hardware․ This typically includes metal brackets and screws․ Position the support frame inside the crib, ensuring it rests securely on the designated ledges within the side panels․
Align the bracket holes with the pre-drilled holes in the crib frame․ Using the provided screws, carefully attach the support frame to the crib sides, headboard, and footboard․ Tighten the screws firmly, but avoid over-tightening, which could strip the wood․
Verify the mattress support is level and securely fastened before proceeding․ This is crucial for ensuring a safe and stable sleeping surface for your baby․
Securing the Crib Frame
Once the headboard, footboard, and side panels are connected, thoroughly inspect the entire crib frame for stability․ Ensure all bolts and screws are present and properly tightened․ Re-tighten any that feel loose, applying even pressure to avoid damaging the wood․
Pay close attention to the corner joints, as these are critical for structural integrity․ Gently rock the crib to test for wobbling; any instability indicates a need for further tightening or adjustment․
Double-check all connections, confirming that the frame is square and solid․ A securely assembled frame is paramount for the safety and longevity of the Graco Benton crib․

Convertible Features & Adjustments
The Graco Benton’s versatility allows transitions from crib to toddler bed, daybed, and full-size bed, adapting to your child’s growing needs․
Adjusting Mattress Height
The Graco Benton crib offers multiple mattress height positions, crucial for adapting to your baby’s developmental stages and ensuring safety․ Initially, set the mattress to the highest level to easily lift and lower your infant․

As your baby begins to sit or stand, lower the mattress to the middle setting to prevent accidental climbing and potential falls․ Finally, when your child is consistently standing, adjust to the lowest position for maximum safety and security․
To adjust, carefully remove the mattress support, reposition the support brackets to the desired level, and securely reattach․ Always ensure all locking mechanisms are engaged before placing the mattress back inside the crib․ Regularly check these adjustments for tightness․
Transitioning to Toddler Bed Configuration
Converting your Graco Benton crib to a toddler bed provides a seamless transition as your child grows․ This typically involves removing one of the crib sides and adding a dedicated toddler guardrail, sold separately, for continued safety․
Carefully detach the crib side according to the assembly manual’s instructions, ensuring all screws and hardware are safely stored․ Attach the toddler guardrail to the designated mounting points, verifying a secure and stable connection․
Ensure the toddler bed is positioned away from walls and other furniture to prevent accidental injury․ A low-to-the-ground mattress is recommended for easy access and increased safety during this phase․
Converting to Daybed Mode
Transforming the Graco Benton into a daybed offers a versatile sleep and play space for your growing child․ This configuration usually involves removing both crib sides, creating an open platform with the existing mattress support․
Detach both sides following the assembly manual’s guidance, keeping all hardware organized․ Ensure the mattress support is securely fastened to the headboard and footboard, providing a stable base․
Consider adding soft cushions and pillows to enhance comfort and create a cozy daybed environment․ Regularly inspect the daybed structure for any loose screws or instability, prioritizing your child’s safety․
Full-Size Bed Conversion Details
Converting the Graco Benton to a full-size bed requires a separate conversion kit, sold independently, which includes the necessary side rails and support structures․ This transition accommodates your child’s growth, extending the crib’s usability for years․
Carefully detach the existing crib sides and footboard, following the kit’s instructions for attaching the full-size bed rails․ Ensure all connections are secure and properly aligned, providing a stable and safe sleeping surface․
A standard full-size mattress is required for this configuration; verify compatibility with the conversion kit․ Regularly inspect all connections and hardware to maintain the bed’s integrity and safety․

Safety Considerations & Warnings
Always adhere to crib safety standards, ensuring a proper mattress fit and regularly inspecting for loose hardware․ Prioritize a secure assembly!
Crib Safety Standards Compliance
The Graco Benton 5-in-1 Convertible Crib is engineered to meet or exceed all applicable safety standards set forth by regulatory bodies․ These standards are crucial for ensuring a secure and protective sleep environment for infants and toddlers․ Rigorous testing is conducted throughout the manufacturing process to verify structural integrity, hardware reliability, and the absence of hazardous materials․
Compliance includes assessments for lead and phthalate content, as well as testing for stability and resistance to entrapment hazards․ Proper assembly, following the provided instructions meticulously, is paramount to maintaining this compliance․ Any modifications or use of non-original parts can compromise the crib’s safety features and void the warranty․ Regularly check all components for tightness and damage, and discontinue use if any issues are detected․
Proper Mattress Fit and Selection
Selecting the correct mattress is vital for your child’s safety and comfort when using the Graco Benton 5-in-1 Convertible Crib․ The mattress must be specifically designed to fit snugly within the crib’s interior dimensions, leaving no gaps exceeding two fingers width between the mattress and the crib sides․ Gaps pose a significant entrapment hazard․
Ensure the mattress is firm and flat, conforming to current safety regulations․ Avoid using soft mattresses, pillows, or loose bedding, as these can increase the risk of suffocation․ Always refer to the crib’s assembly manual for the recommended mattress size and specifications․ Regularly check the mattress for any signs of wear or damage, replacing it if necessary to maintain a safe sleep surface․
Avoiding Common Assembly Errors
Carefully review the Graco Benton’s assembly instructions before beginning, identifying all parts and hardware․ A frequent error is misidentifying screws or using incorrect fasteners, leading to instability․ Ensure all screws are tightened securely, but avoid over-tightening, which can strip the screw holes or damage the wood․
Double-check the orientation of each piece during assembly; incorrect placement can necessitate disassembly and re-assembly․ Pay close attention to the headboard and footboard attachments, ensuring they are firmly secured․ If encountering difficulty, revisit the instructions or the official assembly video for clarification, preventing potential structural weaknesses․
Regular Maintenance and Inspection
To ensure continued safety and stability, routinely inspect the Graco Benton crib․ Periodically check all screws and bolts, tightening any that have loosened over time – a monthly inspection is recommended․ Inspect the crib’s frame for any signs of damage, such as cracks or splinters, addressing them promptly․
Regularly clean the crib with a damp cloth and mild soap, avoiding abrasive cleaners․ Ensure the mattress remains a snug fit, with no gaps between the mattress and crib sides․ Consistent maintenance and vigilant inspection will help maintain a secure and reliable sleep environment for your child throughout its various configurations․

Troubleshooting Common Issues
If you encounter problems during assembly, check for missing parts or address wobbling․ Stripped screws can often be resolved with wood glue and careful re-tightening․
Missing Parts Replacement
Discovering a missing part during Graco Benton crib assembly can be frustrating, but Graco offers solutions․ First, carefully re-inventory all components, cross-referencing with the parts list in your assembly manual․ Double-check the packaging materials, as smaller items are sometimes concealed within․
If a part is genuinely missing, contact Graco Customer Support directly․ Have your crib’s model number and date of purchase readily available to expedite the process․ Graco typically ships replacement parts free of charge, ensuring you can complete the assembly without delay․ Be prepared to provide proof of purchase, such as a receipt or order confirmation․
Alternatively, explore online forums or Graco’s official website for potential assistance from other customers who may have experienced similar issues․ Remember to prioritize safety and avoid using substitute parts that haven’t been approved by Graco․
Addressing Wobbling or Instability
A wobbly or unstable Graco Benton crib poses a safety risk and requires immediate attention․ Begin by systematically re-tightening all screws, bolts, and fasteners, ensuring they are firmly secured but not over-tightened․ Focus on the connections between the crib sides, headboard, footboard, and mattress support․
If wobbling persists, check that the crib is assembled on a level surface․ Use shims under the legs to compensate for uneven flooring․ Inspect each component for any signs of damage or misalignment․ Ensure the mattress support is correctly installed and securely locked into place․
Avoid placing heavy objects against the crib, as this can exacerbate instability․ If problems continue, contact Graco Customer Support for further assistance and potential replacement parts․
Dealing with Stripped Screws
Stripped screws during Graco Benton crib assembly can be frustrating, but are addressable․ First, stop tightening immediately to prevent further damage․ Attempt using a rubber band or steel wool placed between the screwdriver and screw head for improved grip․ If unsuccessful, try a screw extractor tool designed to remove damaged screws․
Avoid using excessive force, as this can worsen the stripping․ Consider replacing the stripped screw with a new one of the same size and type – contact Graco Customer Support for replacements if needed․ Ensure the replacement screw is properly aligned before tightening․
Prevent stripping by using the correct screwdriver size and applying even pressure during assembly․

Resources and Support
Explore Graco’s official assembly video, online manual, and dedicated customer support for assistance․ Find FAQs and replacement parts easily online․
Official Graco Assembly Video
For a visual guide to assembling your Graco Benton 5-in-1 Convertible Crib, Graco provides an official step-by-step assembly video․ This resource is incredibly helpful, demonstrating each stage of the process clearly and concisely․ The video walks you through everything from unboxing and parts identification to the final securing of the crib frame;
It’s highly recommended to watch the entire video before beginning assembly to familiarize yourself with the steps involved․ Referencing the video alongside your physical assembly instructions will ensure a smoother and more accurate build․ You can typically find this video linked on the Graco website, retailer product pages, or through a direct search on video platforms like YouTube․ This valuable tool minimizes errors and maximizes confidence during assembly․
Accessing the Assembly Manual Online
Alongside the helpful assembly video, a comprehensive assembly manual is readily available online for your Graco Benton 5-in-1 Convertible Crib․ This digital resource provides detailed diagrams, parts lists, and written instructions to guide you through each step of the assembly process․ You can often find a downloadable PDF version of the manual directly on the Graco website’s support section․
Alternatively, many retailers who sell the crib also provide a link to the manual on their product pages․ A quick online search for “Graco Benton assembly manual” will also yield relevant results․ Having the manual accessible digitally allows for easy reference and printing if desired, ensuring you have all the necessary information at your fingertips throughout the build․
Graco Customer Support Contact Information
If you encounter any difficulties during the assembly of your Graco Benton 5-in-1 Convertible Crib, Graco’s dedicated customer support team is available to assist you․ For immediate help, you can reach them via phone during their business hours; specific contact numbers are listed on the Graco website․ Alternatively, Graco offers comprehensive support through their online channels․
Their website features a detailed FAQ section addressing common assembly questions and troubleshooting tips․ You can also submit inquiries through an online contact form, receiving a personalized response from a support representative․ Graco prioritizes customer satisfaction and is committed to ensuring a smooth assembly experience for all their products․
Frequently Asked Questions (FAQ)
Q: What if parts are missing from the Graco Benton crib box? A: Contact Graco customer support immediately; they will arrange for replacements to be shipped to you promptly․ Q: The crib feels wobbly after assembly․ A: Double-check all screws and connections, ensuring they are tightened securely․ Refer to the assembly manual for torque specifications․
Q: Can I use power tools during assembly? A: While possible, hand tools are recommended to avoid over-tightening and potential damage․ Q: Where can I find the official assembly video? A: It’s readily available on Graco’s website and various online video platforms․ Q: What type of mattress is compatible with this crib? A: A standard crib mattress with dimensions of 27 ¼” x 52 ¼” x 6” is recommended․
Product Specifications
The Graco Benton crib boasts dimensions suitable for standard nurseries, supporting up to 50 lbs, constructed from durable, high-quality engineered wood materials․
Crib Dimensions
Understanding the Graco Benton’s dimensions is crucial for ensuring it fits comfortably within your nursery space and meets safety requirements․ The overall exterior dimensions of the assembled crib typically measure approximately 54․5 inches in length, 29․75 inches in width, and 36․6 inches in height․
These measurements are approximate and can vary slightly depending on the specific configuration and assembly․ The internal mattress platform dimensions are designed to accommodate a standard crib mattress measuring 52 x 28 inches, providing a secure and appropriately sized sleep surface for your baby․
Carefully consider these dimensions when planning your nursery layout and verifying compatibility with existing furniture and room constraints․ Accurate measurement ensures a safe and functional sleep environment․
Weight Capacity
The Graco Benton 5-in-1 Convertible Crib is engineered with a robust design to safely support your growing child through various stages․ The crib is generally rated to hold a maximum weight of 50 pounds; This weight limit applies to the crib configuration and should be strictly adhered to for safety reasons․
As your child transitions to the toddler bed, daybed, or full-size bed configurations, the weight capacity may differ․ Always consult the specific instructions for each conversion stage to understand the appropriate weight limits․
Regularly monitor your child’s weight and ensure it remains within the specified limits to prevent potential hazards and maintain the crib’s structural integrity․
Materials Used in Construction
The Graco Benton 5-in-1 Convertible Crib is primarily constructed from high-quality, durable materials designed for longevity and safety․ The main frame and components typically utilize New Zealand pine wood, known for its strength and stability․ This wood is carefully selected to ensure it meets stringent safety standards․
Additionally, engineered wood composites may be incorporated into certain parts of the crib to enhance structural support and durability․ Non-toxic finishes are applied to the wood surfaces, providing a protective layer while prioritizing your child’s health․
All materials are compliant with relevant safety regulations, ensuring a secure and healthy sleep environment for your baby․

Warranty Information
Graco offers a warranty on the Benton crib, covering manufacturing defects․ Register your product promptly to activate coverage and enjoy peace of mind!
Graco Crib Warranty Details
Graco stands behind the quality and safety of its products, including the Benton 5-in-1 Convertible Crib․ The warranty typically covers defects in materials and workmanship for a specified period from the date of purchase․ It’s crucial to retain your proof of purchase for warranty claims․
Generally, the warranty doesn’t cover normal wear and tear, or damage resulting from misuse, accidents, or modifications․ Carefully follow the assembly instructions to avoid voiding the warranty․ Graco’s warranty provides remedies such as repair or replacement of defective parts, at their discretion․
To understand the full scope of coverage, including the duration and specific exclusions, refer to the official Graco warranty statement included with your crib or available on their website․ Registering your product enhances the warranty process․
Registering Your Product
Registering your Graco Benton 5-in-1 Convertible Crib is a simple yet valuable step․ It allows Graco to directly contact you with important safety updates, product recalls, and exclusive offers․ Registration also streamlines the warranty claim process should you ever need to utilize it․
Typically, you can register your crib online through the official Graco website․ You’ll need to provide the model number, date of purchase, and your contact information․ Keep your purchase receipt handy, as you may be asked to provide proof of purchase during registration․
This proactive measure ensures you stay informed and benefit from Graco’s commitment to product safety and customer satisfaction․ It’s a quick and easy way to enhance your ownership experience․