Bleach Bath for Hair: A Comprehensive Guide
Hair bleaching is a popular trend, but frequent bleaching can permanently open cuticles, leading to moisture loss and potential damage; careful consideration is crucial.
What is a Bleach Bath?
A bleach bath isn’t a traditional hair washing experience; it’s a diluted bleach treatment designed to gently lift color from hair, minimizing damage compared to standard bleaching. It’s particularly useful for correcting uneven tones, removing unwanted brassiness, or preparing hair for a new color. Unlike direct bleach application, a bleach bath combines bleach with a shampoo or conditioner, creating a less concentrated solution.
This dilution slows down the processing speed, offering more control and reducing the risk of over-processing. The goal is to open the hair cuticle just enough to release existing color molecules without causing significant structural damage. It’s a popular technique for those experimenting with hair color or attempting to lighten previously treated hair, offering a less aggressive approach to achieving desired results. However, even diluted bleach still carries risks, necessitating careful execution and post-treatment care.
Understanding Hair Porosity & Bleach Baths
Hair porosity – the ability of hair to absorb and retain moisture – significantly impacts how it reacts to a bleach bath; Low porosity hair has tightly closed cuticles, resisting moisture and making it harder for the bleach solution to penetrate, potentially leading to uneven results. High porosity hair, with open cuticles, absorbs quickly but also loses moisture rapidly, increasing vulnerability to damage.
Understanding your hair’s porosity is crucial for adjusting the bleach bath’s strength and processing time. Highly porous hair may require a weaker solution and shorter processing time to prevent excessive damage. Conversely, low porosity hair might benefit from gentle heat to help lift the cuticles and allow for better color removal. Ignoring porosity can lead to breakage, dryness, or an ineffective bleach bath, emphasizing the importance of a pre-treatment assessment.
Benefits of a Bleach Bath
Bleach baths offer a gentler alternative to traditional bleaching, minimizing damage while still achieving desired lightening. They’re particularly useful for removing built-up color, box dye, or brassiness, restoring vibrancy and tone to previously colored hair. Unlike direct application, the diluted bleach solution in a bath reduces intensity, lessening the risk of severe chemical burns or breakage.
This method allows for more controlled lightening, making it suitable for those with already damaged hair seeking subtle changes. A bleach bath can also improve hair’s overall condition by removing impurities and smoothing the cuticle. However, it’s not a restorative treatment; it’s a corrective one, and proper aftercare is vital to maintain health and prevent further damage. It’s a nuanced process requiring careful execution.
Risks and Potential Damage
Despite being gentler, bleach baths still carry inherent risks. Over-processing remains a significant concern, leading to extreme dryness, brittleness, and breakage, especially with already compromised hair. Scalp irritation, characterized by redness, burning, or itching, is also possible, particularly for those with sensitive skin. Prolonged exposure to chlorine, even in diluted forms, can contribute to accelerated aging and potential respiratory issues.
Incorrect mixing or application can result in uneven lightening or chemical burns. Open hair cuticles, a consequence of bleaching, increase moisture loss, making hair prone to damage. High temperatures during washing exacerbate these risks, potentially causing scalding. Always prioritize safety and thorough aftercare to mitigate these potential adverse effects.
Preparing for Your Bleach Bath
Prior preparation is key; gather supplies, perform a patch test, and carefully assess your hair’s current condition to minimize risks and maximize results.
Gathering Your Supplies
Essential supplies for a successful bleach bath include a plastic or glass bowl – avoid metal as it can react with the bleach – and a tint brush for precise application. You’ll need your chosen bleach powder, developer (volume determined by your hair’s condition and desired lift), and a clarifying shampoo to open the hair cuticle.
Crucially, gather a deep conditioner or hair mask for post-treatment hydration, as bleach can be incredibly drying. Protective gloves are non-negotiable to shield your skin, and an old towel or cape will protect your clothing. Consider having a timer handy to accurately monitor processing time.
Finally, ensure you have access to cool water for rinsing and a well-ventilated area to work in, as bleach fumes can be irritating. Having a non-phosphate detergent available can also be beneficial for cleaning.
Patch Test: Ensuring Safety
Prioritizing safety begins with a crucial patch test. Before applying the bleach bath to your entire head, mix a small amount of the solution and apply it to a discreet area, like behind your ear or on a strand of hair underneath. This assesses potential allergic reactions or sensitivities.
Wait 48 hours, carefully observing the area for any signs of irritation – redness, itching, burning, or swelling. If any adverse reaction occurs, do not proceed with the bleach bath. Even if no immediate reaction is visible, monitor for accelerated aging or respiratory conditions.
This step is especially vital if you have sensitive skin or a history of allergies. Remember, preventing damage is always preferable to repairing it. A successful patch test provides peace of mind and safeguards your hair and scalp.
Assessing Your Hair’s Current Condition
Before embarking on a bleach bath, a thorough assessment of your hair’s health is paramount. Consider its porosity – how well it absorbs and retains moisture. Highly porous hair, with permanently open cuticles, is already vulnerable and requires extra caution.
Evaluate the level of damage. Is your hair brittle, dry, or prone to breakage? Previously bleached or chemically treated hair is inherently weaker. Note any existing scalp irritation or sensitivity. A compromised scalp increases the risk of adverse reactions.
Understanding your hair’s current state dictates the bleach bath’s strength and processing time. Severely damaged hair may benefit from a gentler approach or even postponing the process altogether. Prioritize hair health over achieving a specific color.
The Bleach Bath Process: Step-by-Step
Carefully mixing the solution and ensuring even application are vital; monitor closely to prevent over-processing and potential damage to your delicate hair strands.
Mixing the Bleach Bath Solution
Creating the bleach bath solution requires precision to balance effectiveness and minimize damage. Begin with your chosen developer volume – typically 10 or 20, depending on desired lift and hair’s condition. In a plastic bowl (avoid metal!), combine the developer with your shampoo; a common ratio is 1 part developer to 2 parts shampoo.
Next, slowly add bleach powder, mixing continuously to form a smooth, creamy consistency. The goal isn’t a thick paste, but a pourable solution. A typical starting point is 1 part bleach powder to the developer/shampoo mixture, but adjust based on desired strength.
Crucially, ensure all ingredients are thoroughly combined, eliminating clumps. Uneven mixing leads to patchy results. If adding a bonding agent (like Olaplex or similar), incorporate it at this stage, following the product’s instructions. Always work in a well-ventilated area and wear gloves to protect your skin.
Application Technique: Even Coverage
Achieving even coverage is paramount for consistent results with a bleach bath. Section your hair into four quadrants – from forehead to nape, and ear to ear – using clips to keep sections separate. Begin application approximately one inch away from the scalp, as heat from the scalp accelerates processing.
Using a dye brush, saturate each section thoroughly with the bleach bath solution, ensuring every strand is coated. Work quickly and methodically to maintain consistent processing times. Once the lengths are covered, return to the roots, applying the mixture carefully.
Avoid overlapping previously lightened areas, as this can cause breakage. Regularly check for complete saturation, especially on thicker sections. Comb through each section with a wide-tooth comb to distribute the solution evenly and remove any clumps.
Processing Time & Monitoring
Processing time for a bleach bath varies depending on your hair’s current state and desired lift, typically ranging from 10 to 30 minutes. Begin checking the color after 10 minutes, and monitor closely every 5 minutes thereafter.
Visual inspection is key; gently wipe a small strand to assess the level of lift. Remember, hair continues to process even after rinsing, so err on the side of caution. Avoid exceeding 30 minutes, as prolonged exposure significantly increases the risk of damage.
Regularly check for signs of distress, such as excessive heat or breakage. If you notice any adverse reactions, rinse immediately. Maintaining consistent monitoring throughout the process is crucial for achieving optimal results while minimizing potential harm to your hair.
Post-Bleach Bath Care
Thorough rinsing and a deep conditioning treatment are essential to restore moisture and health after a bleach bath, preventing further damage and dryness.
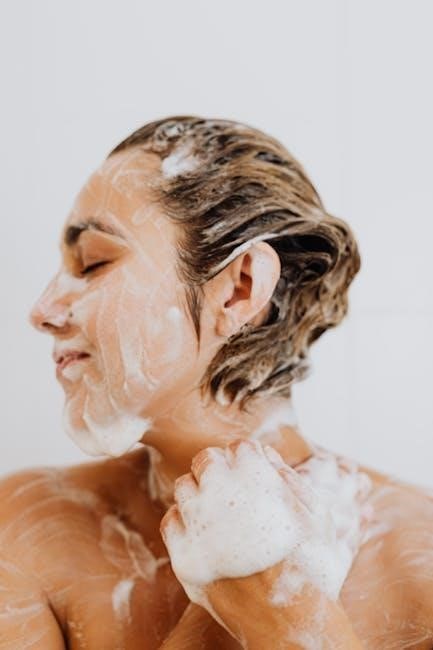
Rinsing Thoroughly
Rinsing is paramount after a bleach bath, demanding patience and meticulous attention to detail. The goal is to completely eliminate all traces of the bleach mixture from your hair shaft. Residual bleach can continue to process, leading to unwanted lightening, increased damage, and significant irritation to your scalp.
Begin with lukewarm water, gradually decreasing the temperature as you rinse. Avoid hot water, as it can exacerbate dryness and open the hair cuticle further. Rinse for an extended period – at least 5-10 minutes – ensuring water flows through every strand.
Periodically, gently squeeze your hair to check for any remaining suds or discoloration in the water. Continue rinsing until the water runs completely clear. A final cool water rinse can help to close the cuticle, locking in moisture and enhancing shine. Don’t rush this crucial step; thorough rinsing is the foundation for successful post-bleach bath care.
Deep Conditioning Treatment
Immediately following a thorough rinse, a deep conditioning treatment is non-negotiable. A bleach bath, while gentler than traditional bleaching, still compromises the hair’s integrity, stripping it of essential moisture. Replenishing this lost hydration is vital for restoring health and preventing breakage.
Opt for a deeply hydrating mask formulated with ingredients like shea butter, argan oil, or coconut oil. Apply generously, ensuring complete saturation from root to tip. For enhanced penetration, consider using a heat cap or wrapping your hair in a warm towel.
Allow the treatment to sit for the recommended time – typically 20-30 minutes – before rinsing again with cool water. This intensive hydration will help to rebuild the hair’s moisture barrier, leaving it feeling softer, smoother, and more manageable. Regular deep conditioning is key to long-term hair health.
Protein Treatment Considerations
While deep conditioning is essential, the role of protein treatments post-bleach bath requires careful consideration; Bleaching inherently weakens the hair’s protein structure, and while protein can temporarily strengthen strands, overuse can lead to protein overload, resulting in brittle, inflexible hair prone to breakage.
Assess your hair’s condition before reaching for a protein treatment. If your hair feels mushy or overly elastic, a light protein treatment might be beneficial. However, if it already feels stiff or dry, prioritize hydration with a deep conditioning mask instead.
Choose a protein treatment with hydrolyzed proteins for optimal absorption. Follow the product instructions carefully, avoiding excessive use. Alternate protein treatments with deep conditioning to maintain a healthy balance of moisture and strength.

Addressing Potential Issues
Breakage, scalp irritation, and unwanted tones are possible after a bleach bath; prompt attention and corrective measures are vital for hair health recovery.
Dealing with Breakage
Breakage following a bleach bath signals significant protein loss and cuticle damage, demanding immediate and consistent restorative care. The primary focus should be on strengthening the hair shaft and minimizing further stress. Immediately cease all chemical treatments, including coloring, perming, and even heat styling.
Introduce a regimen of intensive deep conditioning treatments at least twice weekly, utilizing products rich in moisturizing ingredients like shea butter, coconut oil, and argan oil. Consider incorporating protein treatments, but use them cautiously and infrequently – excessive protein can lead to brittleness.
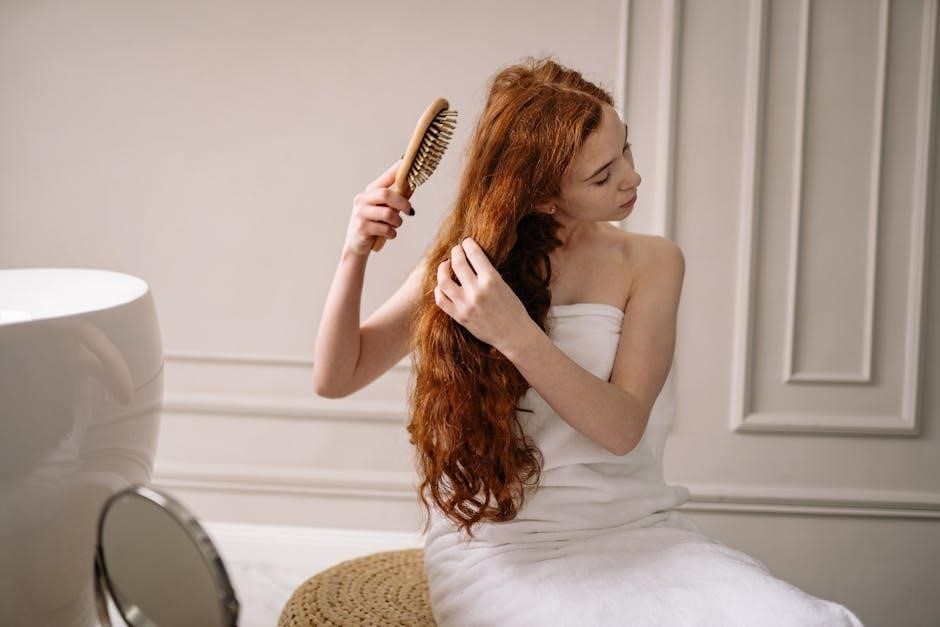
Gentle handling is paramount. Use a wide-tooth comb to detangle wet hair, starting from the ends and working your way up. Sleep on a silk or satin pillowcase to reduce friction. Regular trims, even small ones, will help eliminate split ends and prevent them from traveling up the hair shaft, exacerbating breakage. Patience is key; repairing severely damaged hair takes time and dedication.
Managing Scalp Irritation
Scalp irritation after a bleach bath is common, manifesting as redness, itching, or even burning sensations. This indicates chemical sensitivity or damage to the scalp’s protective barrier. Immediately following the bleach bath, a thorough and gentle rinse is crucial to remove all traces of the solution.
Apply a soothing scalp treatment containing ingredients like aloe vera, chamomile, or colloidal oatmeal to calm inflammation and restore moisture. Avoid harsh shampoos containing sulfates, opting instead for a gentle, pH-balanced formula. Refrain from scratching the scalp, as this can worsen irritation and potentially lead to infection.
If irritation persists or becomes severe, consider consulting a dermatologist. They may recommend a topical corticosteroid to reduce inflammation. Preventative measures, like a patch test before application, are vital to minimize future scalp sensitivity.
Toning After a Bleach Bath
Toning is a vital step post-bleach bath, neutralizing unwanted brassy or yellow tones revealed during the lightening process. Bleach lifts the hair’s natural pigment, often leaving behind warm undertones. A toner deposits complementary pigments to achieve a desired, cooler shade – be it platinum blonde, ash brown, or anything in between.
Choose a toner based on your target shade and hair’s current state. Purple toners counteract yellow tones, while blue toners neutralize orange. Apply the toner evenly, following the product’s instructions regarding processing time. Over-toning can result in unwanted purple or grey hues, so careful monitoring is essential.
Always perform a strand test before applying toner to the entire head. Following toning, a deep conditioning treatment is recommended to restore moisture and health to the hair.

Long-Term Hair Health & Maintenance
Regular deep conditioning and protecting hair from heat styling are essential for long-term health, alongside preventing chlorine damage to maintain vibrancy;
Preventing Damage from Chlorine
Chlorinated water, commonly found in swimming pools, poses significant long-term risks to bleached hair. It can accelerate aging, increase cancer risks, and directly damage both skin and hair, leading to dryness and brittleness. The porous nature of bleached hair, especially after a bleach bath, makes it particularly vulnerable to chlorine absorption.
To mitigate these effects, several preventative measures are crucial. Before swimming, thoroughly wet your hair with clean water and apply a leave-in conditioner or hair oil to create a protective barrier. Consider wearing a swimming cap to physically shield your hair from direct chlorine exposure.
Immediately after swimming, rinse your hair thoroughly with clean water, followed by a clarifying shampoo specifically designed to remove chlorine buildup. Follow up with a deep conditioning treatment to restore moisture and repair any potential damage. Consistent implementation of these steps will help preserve the health and integrity of your bleached hair, minimizing the detrimental effects of chlorine exposure.
Regular Deep Conditioning Schedule
Bleach baths, while effective for color correction and gentle lightening, inherently compromise the hair’s structural integrity, increasing porosity and moisture loss. Therefore, establishing a consistent deep conditioning schedule is paramount for maintaining hair health post-treatment. Frequent deep conditioning replenishes lost moisture, strengthens the hair shaft, and improves elasticity, reducing the risk of breakage.
A recommended schedule involves deep conditioning at least once a week, or even twice weekly for severely damaged or highly porous hair. Utilize masks rich in hydrating ingredients like shea butter, argan oil, or hyaluronic acid. Consider incorporating protein treatments periodically – but not consecutively with moisturizing masks – to rebuild the hair’s protein structure.
Leave the deep conditioner on for the recommended time, often 20-30 minutes, and enhance penetration with a heat cap or warm towel. Consistent adherence to this schedule will significantly contribute to restoring and maintaining the health, vibrancy, and resilience of your bleached hair.
Protecting Hair from Heat Styling
Following a bleach bath, hair is inherently more vulnerable to heat damage. The process lifts the hair cuticle, making it porous and susceptible to breakage when exposed to high temperatures from styling tools like blow dryers, straighteners, and curling irons. Minimizing heat styling is crucial for preserving hair health and preventing further damage.
When heat styling is unavoidable, always apply a high-quality heat protectant spray or serum beforehand. Opt for lower heat settings on your styling tools and avoid prolonged exposure. Consider air-drying your hair whenever possible, and explore heatless styling methods like braids, buns, or rollers.
Regular trims to remove split ends are also essential, as damaged ends are more prone to breakage with heat application. Prioritizing gentle handling and minimizing heat exposure will significantly contribute to maintaining the integrity and longevity of your bleached hair.